Bank account reconciliation is no fun, but it keeps your balances accurate. Here’s how QuickBooks can help you get ready. If you had to make a list of your five least favorite financial chores, bank account reconciliation would undoubtedly be on it. No one likes reconciling. But what good does it do to have QuickBooks tell you your account balances if there’s a chance they’re not accurate? QuickBooks’ ability to import your bank account transactions makes this process easier than the old checkbook register and calculator method. Because you can see transactions once your bank has cleared them, you can actually do some of your prep work on an almost daily basis, rather than having to do everything at the end of the month.
Why Reconcile?
We strongly advise you to use QuickBooks’ reconciliation tools, for a variety of reasons. Besides knowing that your QuickBooks balance is accurate, there are numerous other benefits. For example, you can:●Monitor your accounts for unauthorized access,
 ●Ensure that your bill payments have cleared,
- ●Match invoices to payments, and,
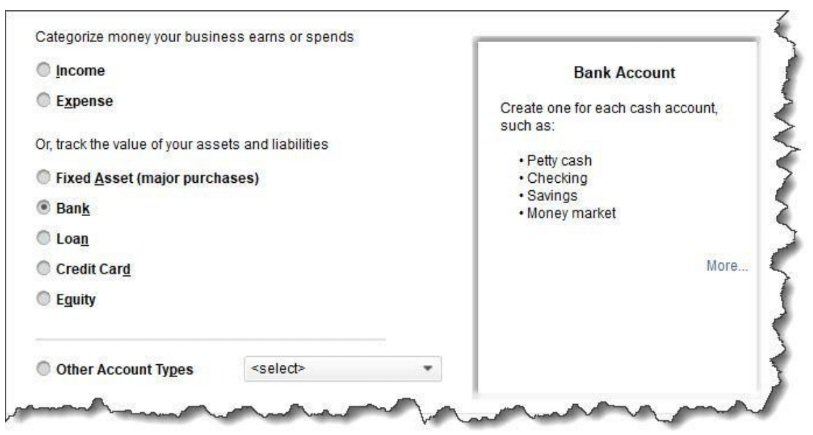
- ●Find errors before they can cause significant problems. But before you begin the actual reconciliation process in QuickBooks, there are steps you should take so your work session goes as smoothly as possible. Here are six tips. Make sure you have QuickBooks accounts set up for all of your real-life bank accounts. The Chart of Accounts can be intimidating, and we try not to send you there unless it’s absolutely necessary. If you’re at all nervous about modifying the backbone of your QuickBooks company file, we can walk you through this. Open the Company menu and select Chart of Accounts. Click the down arrow next to Account in the lower left corner and select New to open a window that looks like this: You’ll see this window when you add an account to QuickBooks’ Chart of Accounts.

