Automate Transaction Categorization Using QuickBooks Online’s Rules
Let’s face it: categorizing transactions is a drag. QuickBooks Online offers you a better, faster way to do it. If you’re importing transactions into QuickBooks Online from your bank (and we hope you are), you probably roll your eyes when you see a big number in parentheses after For review on your Bank transactions page.
On one hand, it’s good to know your business is very active. On the other hand, it means you have to spend some time
going over your transactions and categorizing them. As tedious a task as it is, it’s critical that you keep up with transaction categorization and do it accurately. If you don’t, your income taxes and reports will not be correct. You could miss out on taking deductions for legitimate business expenses and have inaccurate views of your overall financial picture.
QuickBooks Online provides a simple, effective way to speed up this onerous process. You can create Rules by identifying transactions whose Description, Bank text, or Amount are the same. QuickBooks Online can then automatically categorize related transactions and move them into the Categorized list. Let’s look at an example of how this can work.
Identify, Then Create a Rule
Open the list of bank transactions that have come into QuickBooks Online since the last time you logged in (Transactions | Bank transactions | For review). Scroll down until you find one from a vendor you know has repeat entries. Let’s say you want every transaction where “The UPS Store” is the vendor to be categorized as Office Supplies. Find one of these transactions and click it to open the expanded view. Complete any fields needed and click Create a rule at the bottom of the box. A panel like the one pictured below slides out from the right.
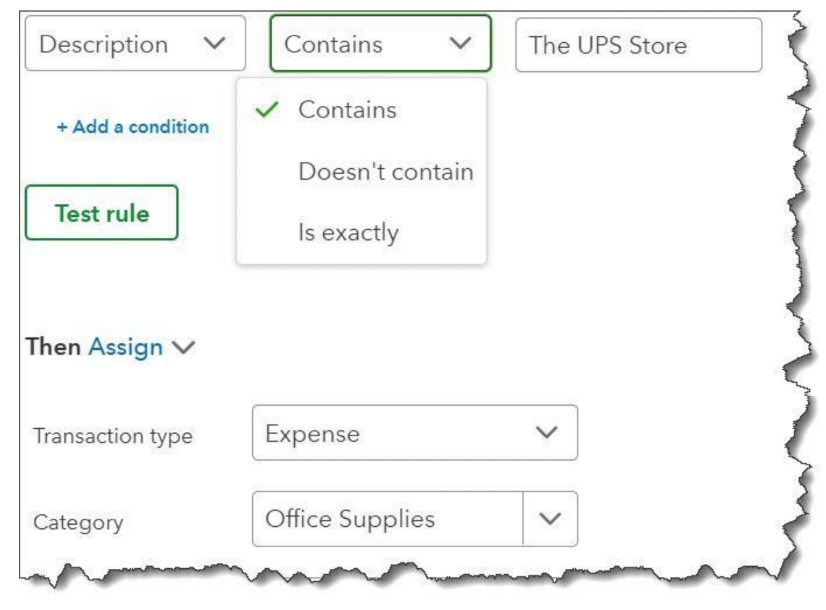
QuickBooks Online allows you to set up Rules to automate transaction management.
You’ll first have to give your rule a name. For our example, we entered UPS Shipping. We wanted the new rule to apply to transactions that involved Money out, and we wanted QuickBooks Online to look in All bank accounts, so we selected those options from the drop-down menus supplied.
You can see in the image above that we had to specify three conditions that needed to be met in order to trigger an action (we also selected All as opposed to Any, meaning the transaction had to meet all three conditions). In the first field, we chose Description(usually the vendor), rather than Bank text(a text field generated by the bank that sometimes looks like gibberish) or Amount. In the second and third fields, we indicated that the Description should Contain “The UPS Store.” If we’d wanted to, we could have added another condition.
Next, QuickBooks Online wanted to know how we wanted the matching transactions treated. We wanted to Assign (not Exclude) them as Expenses, with the Category of Office Supplies. We didn’t need to select a Product/Service, but we selected the correct vendor for the Who you paid field.