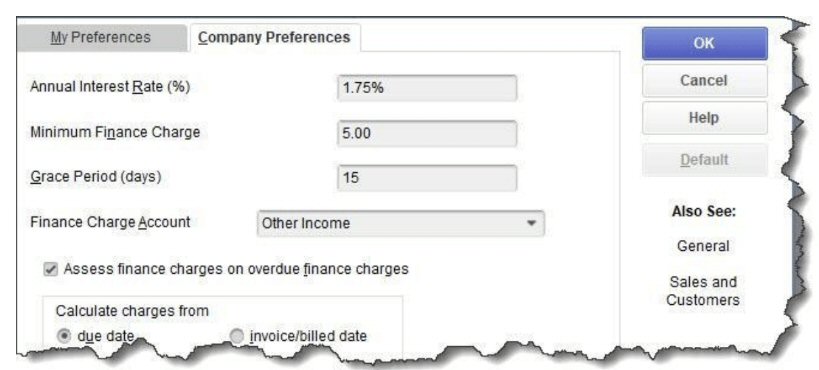
Are your receivables out of control? QuickBooks can help you assess finance charges. Now that we’re past the holidays and you’ve had January to catch up on the December work that didn’t get done, how’s your financial workflow? Are you caught up on bills and invoices? You may be, but your customers might not be. You can find out by creating an Open Invoices report (Reports | Customers & Receivables) and looking in the Aging column to see how many days invoices are past due. We’ve discussed ways you can encourage your customers to pay faster. You can, for example:●Allow them to pay using credit cards and bank transfers ,●Send invoices immediately after a sale, and ,●Offer a premium for paying bills on time12 months in a row, like a discount on future sales. There’s another tool in your QuickBooks toolbox: finance charges. Laying the Groundwork for Finance Charges Before you can start charging customers late fees, you have some setup work to do. Open the Edit menu and select Preferences. Scroll down and click Finance Charges, then Company Preferences.

Finance charge assessment requires some setup work. There are several questions you’ll have to answer, including:What will you charge as an Annual Interest Rate?What will your Minimum Finance Charge be?How long will the Grace Period be? How many days can pass before the finance charges kick in? 15-21 days is typical.When you collect interest on past-due payments, where should the funds go? In the above example, we’ve selected Other Income.Do you plan to Assess finance charges on overdue finance charges? You’ll need to find out what your local laws are here. In some jurisdictions, you’re limited on what interest you can charge on overdue finance charges.Will you Calculate charges from the due date or invoice/billed date? When do you want QuickBooks to consider that a payment is past due and eligible for finance charges? How Are Finance Charges Billed? You may be accustomed to seeing finance charges included on a bill. QuickBooks doesn’t work this way. You’ll have to print separate invoices for finance charges alone. If you want to use this option, check the box in front of Mark finance charge invoices “To be printed .”If you leave that box blank, finance charges will appear on each customer’s next statement. So if you don’t send statements on a regular basis, it’s best to let the charges be printed separately. Click OK when you’re done with this window.Not sure when statements should be sent or how to create them in QuickBooks? Contact us for guidance.How Do You Assess Finance Charges?
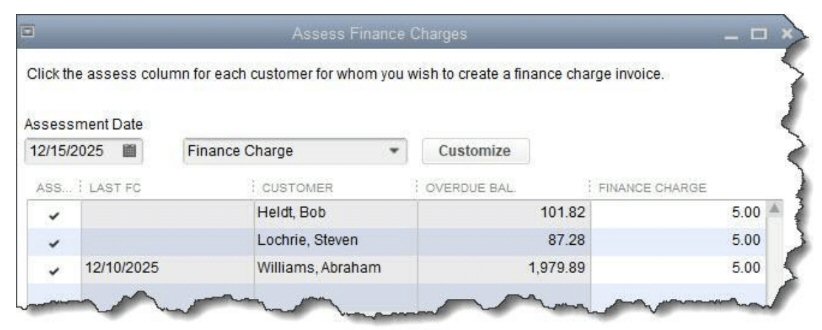
QuickBooks will find the customers who owe finance charges as of the Assessment Date andd isplay them in this window. When you’re ready to see who owes interest on late payments, open the Customers menu and click Assess Finance Charges. QuickBooks will open a window like the one pictured above. Be sure the date showing at the top is the actual Assessment Date, which may or may not be the current date. Create a checkmark in the first column in front of all the customers who should receive finance charges. Two buttons at the bottom of this window open the Settings page from QuickBooks’ Preferences and the Collection History for individual customers. As you did before, check the box in front of Mark invoices “To be printed ”if you want QuickBooks to print individual invoices for these finance charges. When you’re ready, click Assess Charges. If you’re going to allow the charges to be included in the customers’ next statements, you don’t have to do anything else for now. But if you want to print the finance charge invoices, open the File menu and click Print Forms | Invoices. The window that opens will display any invoices you have specified “To be printed”. In the number (NO) column, any entry that begins with FC is a finance charge invoice. Put a checkmark in front of any invoice that you want to print, then click OK.